Airflow OpenMLDB Provider
Contents
Airflow OpenMLDB Provider#
We provide the Airflow OpenMLDB Provider to use the OpenMLDB in Airflow DAG more easily. This manual will use the Airflow to manage the training and deployment tasks in the TalkingData Demo.
TalkingData DAG#
We will use the DAG created by example_openmldb_complex.py in the Airflow.
You can import the DAG into the Airflow and run it directly.
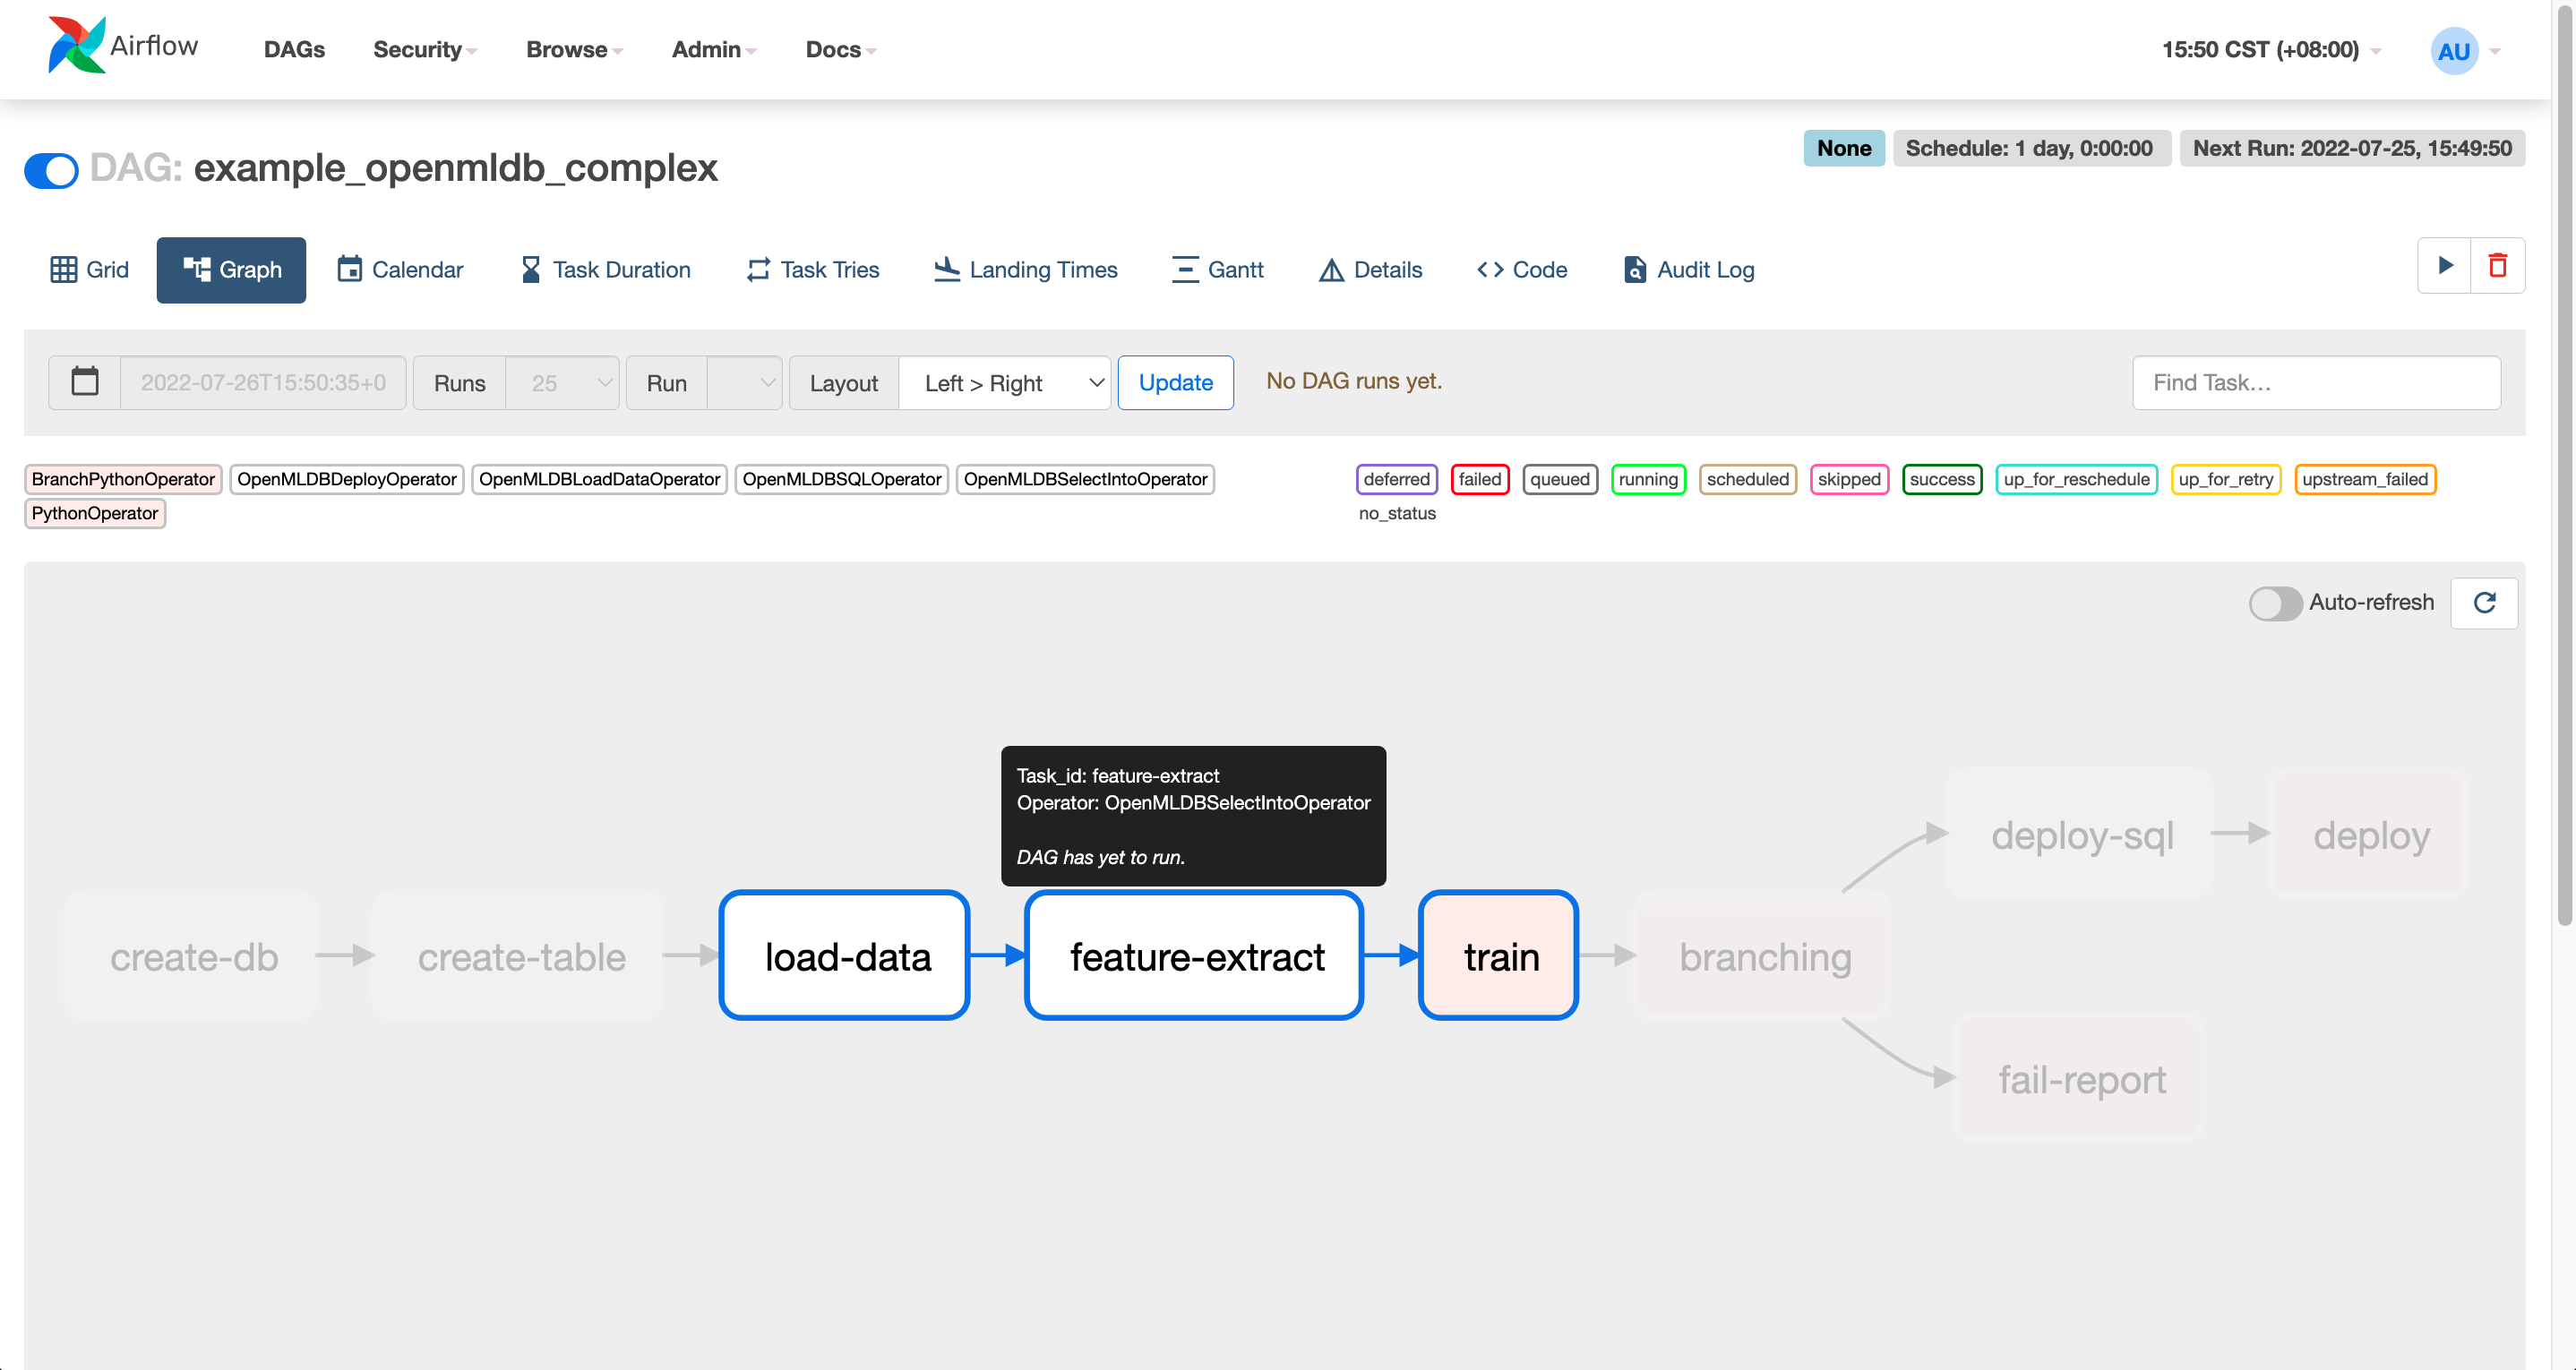
The workflow of the DAG is shown above. The tables will be created at first, then the offline data will be imported and processed for feature extraction. After training, if the AUC of the model is greater than 99.0, then the SQL script and the model can be deployed. Otherwise, the workflow will report failure.
Demo#
The DAG mentioned above will be used to complete the feature extraction and deployment work in the TalkingData Demo, and the predict_server in this demo is responsible for the real-time prediction after deployment.
0 Preparations#
0.1 Download DAG#
Both the DAG and the training script can be gained by downloading airflow_demo_files.
wget https://openmldb.ai/download/airflow_demo/airflow_demo_files.tar.gz
tar zxf airflow_demo_files.tar.gz
ls airflow_demo_files
For the newest version, please visit GitHub example_dags.
0.2 Start the Docker Image#
It is recommended to install and start the OpenMLDB image and the Airflow in Docker.
The port of the container needs to be exposed for the Airflow Web login.
Please project the previously downloaded files to the path
/work/airflow/dags, where Airflow will access for the DAG.
docker run -p 8080:8080 -v `pwd`/airflow_demo_files:/work/airflow/dags -it 4pdosc/openmldb:0.6.9 bash
0.3 Download and Install the Airflow and the Airflow OpenMLDB Provider#
Run the following command in Docker.
pip3 install airflow-provider-openmldb
Since the Airflow OpenMLDB Provider relies on the Airflow, they will be downloaded together.
0.4 Prepare the Dataset#
Since the data import path of the DAG is /tmp/train_sample.csv, we have to copy the data file to /tmp directory.
cp /work/talkingdata/train_sample.csv /tmp/
1 Start the OpenMLDB and the Airflow#
The following commands will start the OpenMLDB cluster. The predict_server supports deployment and test, and the standalone Airflow.
/work/init.sh
python3 /work/talkingdata/predict_server.py --no-init > predict.log 2>&1 &
export AIRFLOW_HOME=/work/airflow
cd /work/airflow
airflow standalone
The username and the password for the Airflow standalone are shown in the picture below.

Please visit http://localhost:8080, enter the username and the password as shown.
Caution
Airflow standalone is a foreground process, the exit will lead to the whole termiantion of the process.
You can quit the Airflow after the DAG is finished then go for Step 3 or just put the Airflow process to the background.
2 Run the DAG#
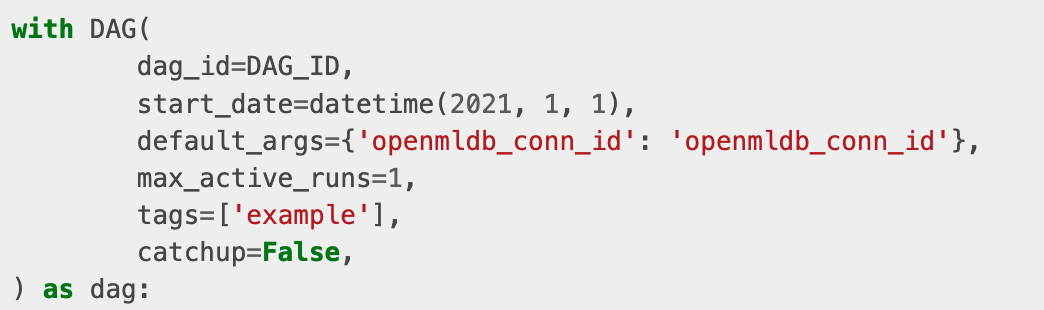
Open the DAG example_openmldb_complex in the Airflow Web and click the Code to check the detail of the DAG.

You can see the openmldb_conn_id that is used in Code. The DAG doesn’t use the address of OpenMLDB but use the connection. We need to create a new connection and name it the same.
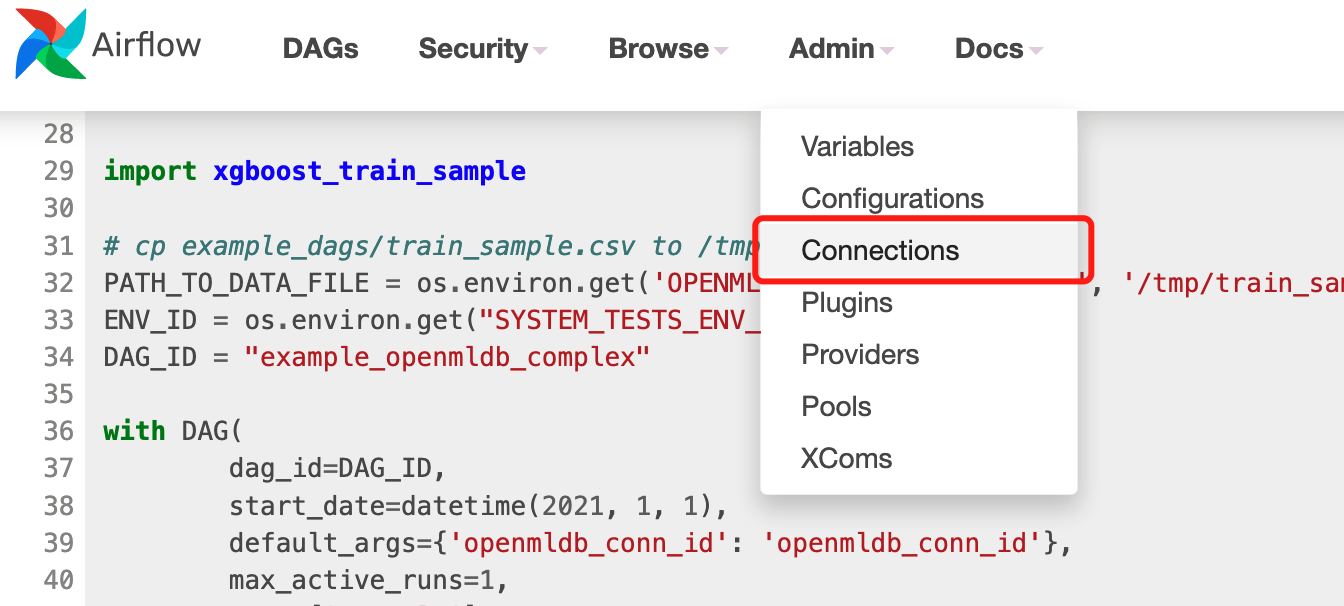
2.1 Create the Connection#
Click the ‘connection’ in the ‘Admin’.
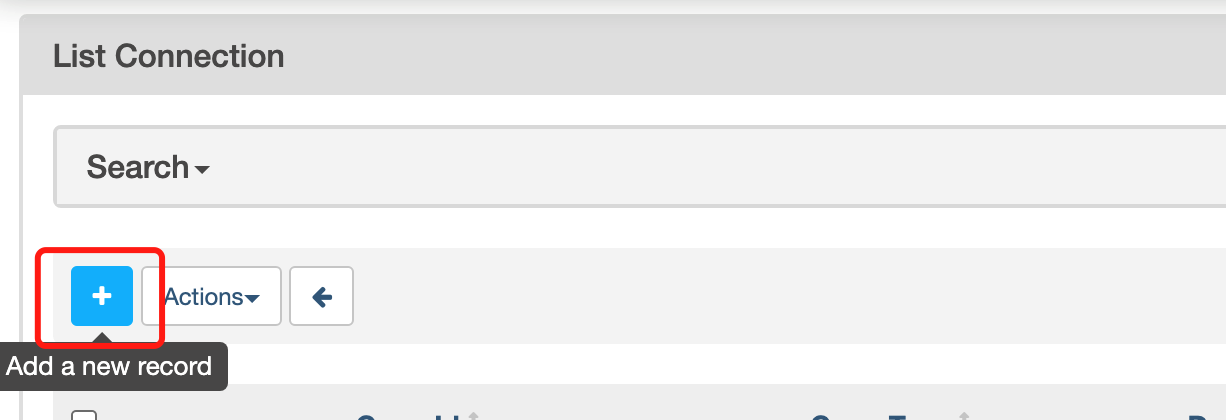
Add a connection.
Please use the address of the OpenMLDB Api Server rather than the address of zookeeper as the Airflow OpenMLDB Provider is connected to the OpenMLDB Api Server.
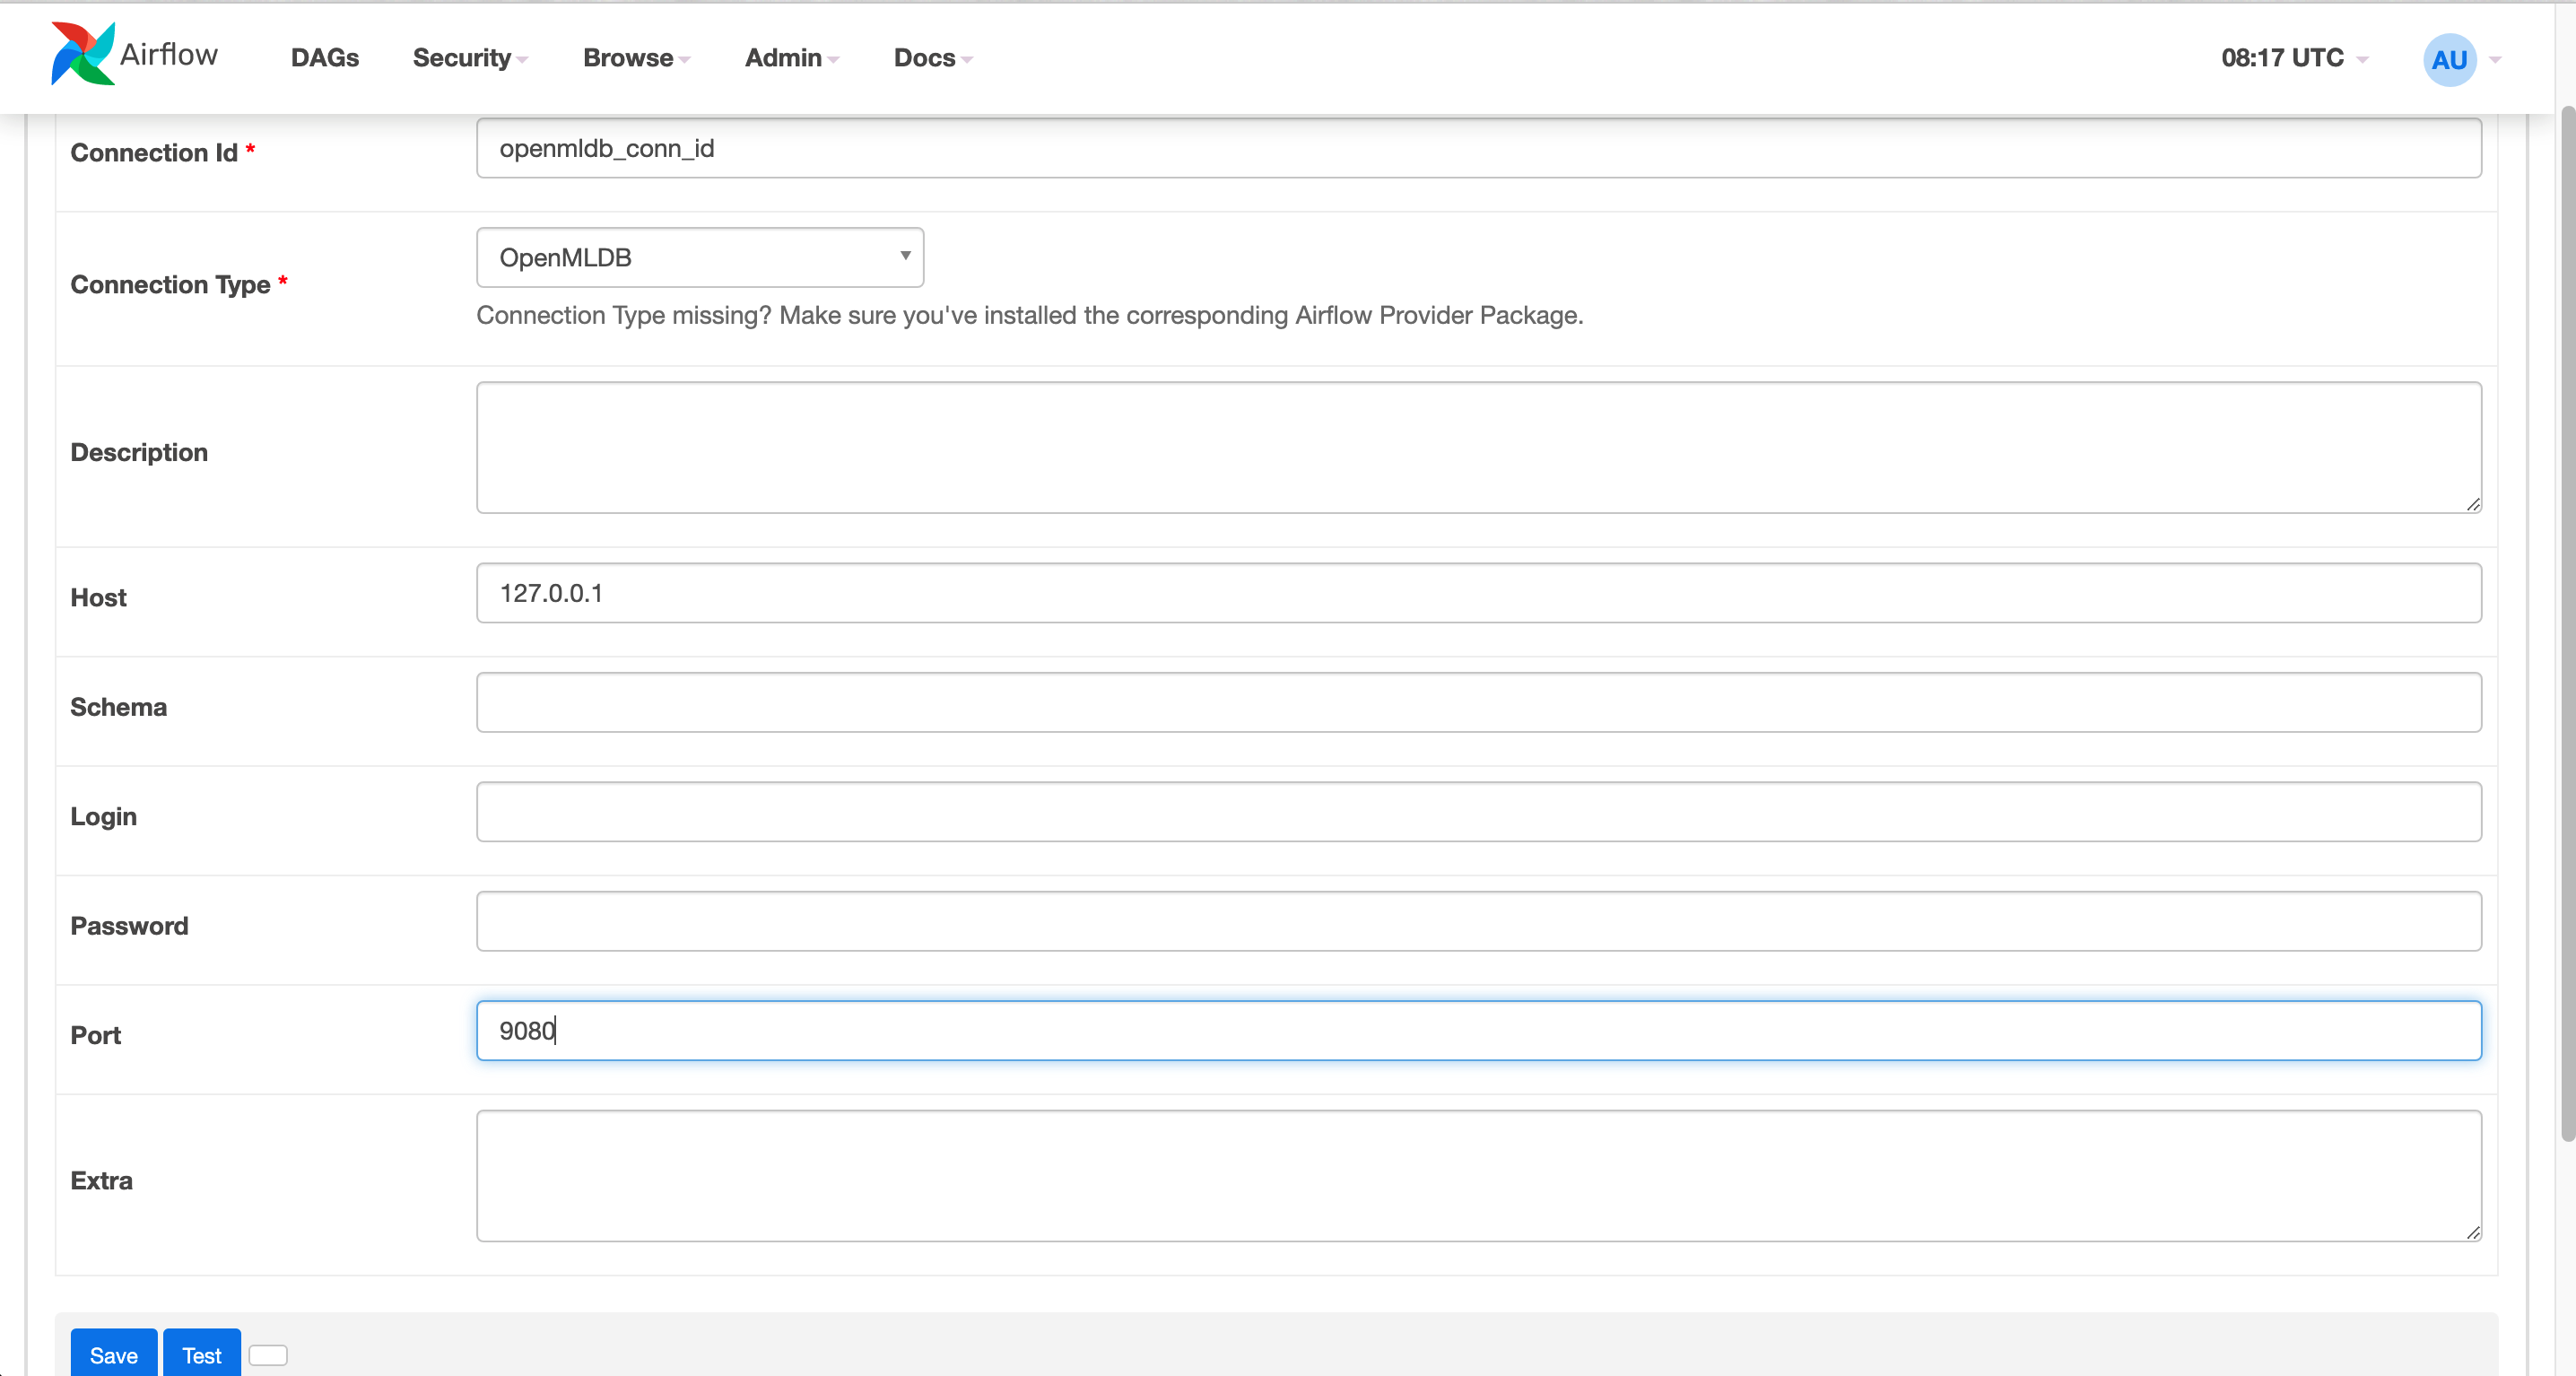
The created connection is shown as the picture below.

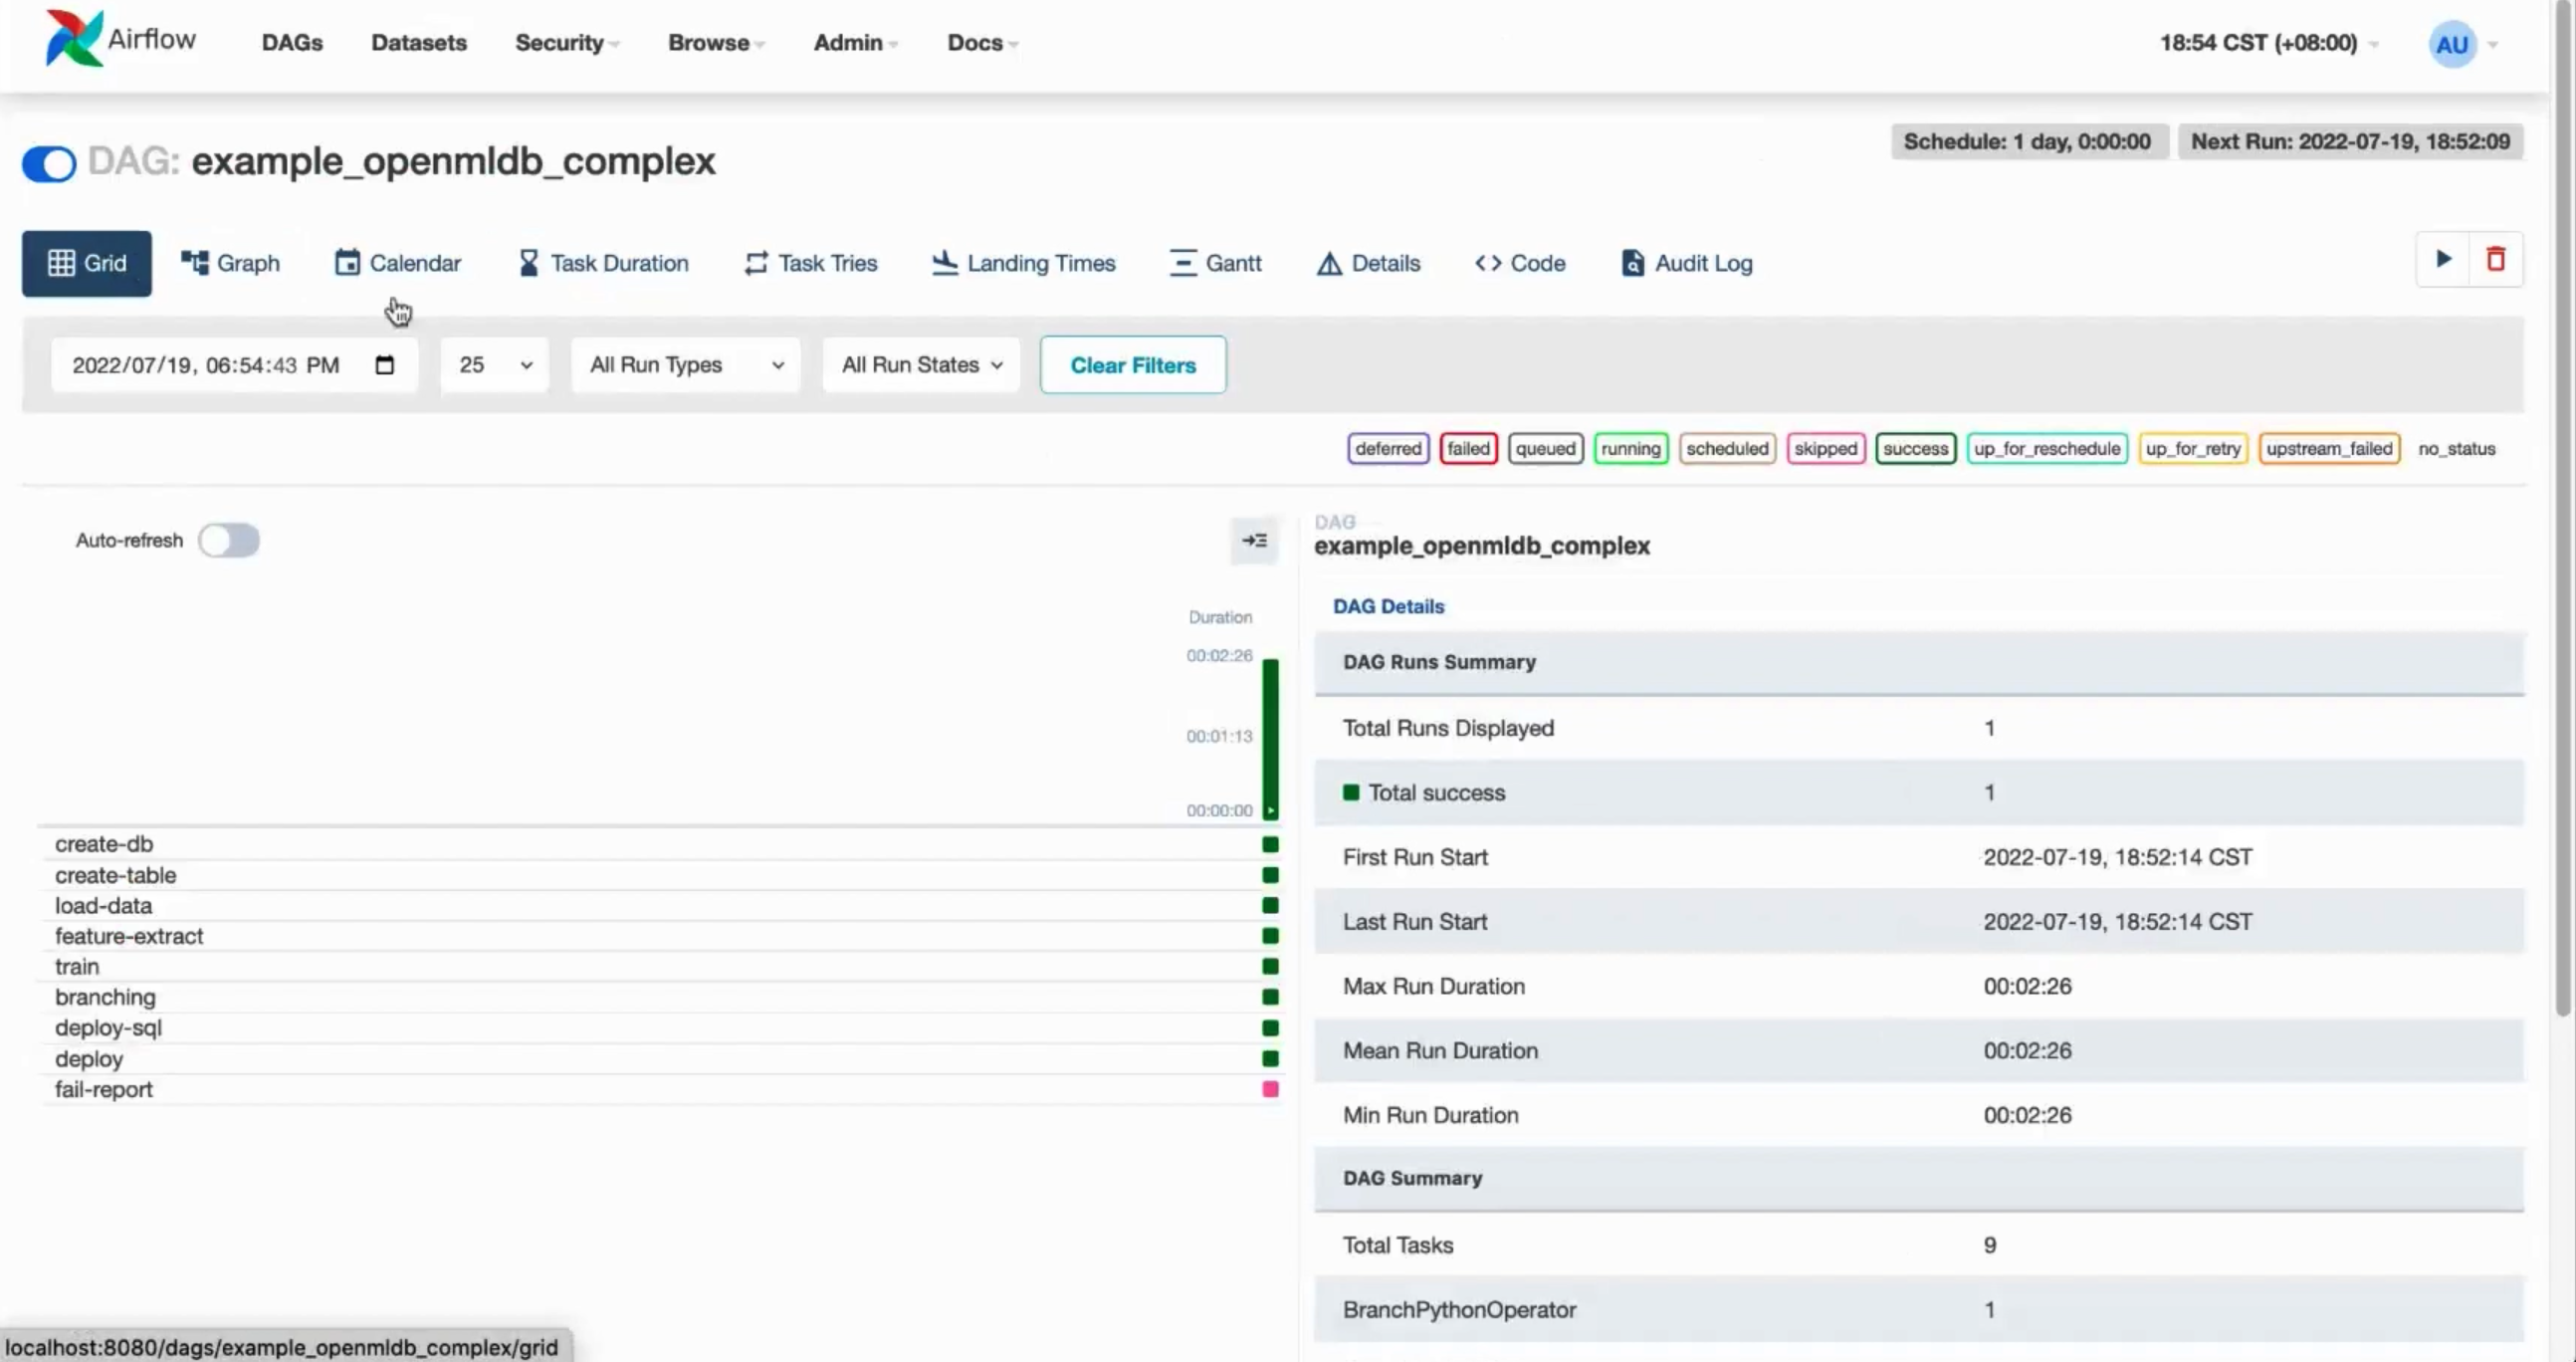
2.2 Run the DAG#
Run the DAG to complete a turn of model training, SQL and model deployment.
A successful run should look like the following figure.
3 Test#
If you run the Airflow foreground, you can quit the Airflow as the subsequent procedures do not depend on it.
3.1 Import the Online Data#
Although the DAG has deployed the SQL and the model, there is no data in the online database. You should run the following command to import the online data.
curl -X POST http://127.0.0.1:9080/dbs/example_db -d'{"mode":"online", "sql":"load data infile \"file:///tmp/train_sample.csv\" into table example_table options(mode=\"append\");"}'
This is an asynchronous operation, but it won’t take too long because of the small data size.
If you want to check the execution state of the command, please use SHOW JOBS.
curl -X POST http://127.0.0.1:9080/dbs/example_db -d'{"mode":"online", "sql":"show jobs"}'
3.2 Prediction#
Run the following prediction script which will use the latest deployed SQL and model.
python3 /work/talkingdata/predict.py
The result is shown below.
